Showing posts with label cheap. Show all posts

Saturday, April 20, 2013

Blossoms in Bloom: An Interview with Jenn Z


Blossoms 

In 

Bloom

An Interview with 

Jenn of Jenn Z Floral Designs 


The following is an interview I did with the very talented florist, my dear friend, Jenn Z of Jenn Z Floral Designs. I had hoped to post this around the holidays, however sometimes time just sweeps you away. Nonetheless, I think these tips are useful for any time of year, and the photos of her arrangements are beautiful! Now that it is SPRING in the Northern Hemisphere, I thought it would be a perfect time to post this. Thanks to Jenn for taking the time out to do the interview.


Jenn, center


Selena: How long have you been a floral artist?

Jenn Z: I started at a flower shop in 2005, but had taken floral arranging classes through 4H throughout childhood. I began my freelance business in the summer of 2009.


Selena: Do you have any basic tips for someone creating their own flower arrangements?


Jenn Z: When making a round arrangement, create triangles. Start out filling the bottom, then add the top flower, then fill in making smaller triangles. This will guarantee that you have a more balanced looking arrangement. Don't forget to space out color evenly too, unless you are purposely blocking colors in the arrangement.

"When making a round 

arrangement [start by] 

creating triangles." 

- Jenn Z 


Selena: What are some good, more affordable flower options? 

Jenn Z: White pom daisies are great for people on a tight budget who love flowers. Pom daisies are not expensive compared to roses and can last up to 3 weeks! Also since several blossoms come on a stem, you can really just trim, and put into a vase if you are intimidated by designing. Spray paint a glass jar red or silver and add a bunch of white pom daisies for a fun holiday arrangement!


"White pom daisies are 

great for people on a 

tight budget who

 love flowers.

 Just trim and put into

 a vase!"

- Jenn Z


Selena: What is a good way to get more bang for your buck when it comes to buying flowers? Are there any secrets?

Jenn Z: Many people are disappointed when they grab roses at the grocery store and they wilt the next day. You can tell if they are older by feeling the blossom or head of the rose. If it feels soft, it is older and will wilt quickly. If it feels firm, it is fresher. Some stores mix in bunches of newer flowers with older flowers to trick consumers into getting the older flowers. Also, rose stems should be cut at a diagonal for optimal hydration.


Selena: Any tips or warnings about certain flowers or flowers to avoid?

Jenn Z: Flowers that have browning edges are usually older, no matter what variety. Try to steer clear of flowers that look older.


Selena: Do you have any tips for decorating your holiday table using flowers?

Jenn Z: Keep table arrangements no taller than 14 in. so that people can see over the arrangements. You can use evergreens in floral arrangements for a holiday feel, you might be able to get free evergreen trimmings from places that sell fresh Christmas trees- it doesn't hurt to ask! Don't forget that jewel tones like dark pinks and purples are beautiful during the holidays, you don't have to just stick to red and green!


To hire Jenn in the Indianapolis, IN area contact her at: jennzdesigns@gmail.com or visit her Facebook fan page.
P.S. In case you were curious about her beautiful photos, she's also a model! All photos courtesy of her Facebook business and personal pages.


Here's an arrangement idea that doesn't require flowers or water: How To Make A Wishing Tree

Check out another plant related blog here: Saving Money Saving Seeds

Working on a wedding? Try this: How To Make Cheap Shoes Look Expensive

Subscribe to Saving With Selena

Wednesday, March 20, 2013

Dried Vegetables


I have been spending a lot of my time lately testing out different ways to dry vegetables. in the past two weeks I have dried mushrooms, carrots, tomatoes, and  potatoes. However my favorite has to be onions. Although the preparation left me with tears streaming down my face, in the end I had some pretty tasty onion chips.which I could crumble to make my own onion spice.

The easiest and quickest way to dry vegetables is to use a dehydrator. If you are like me, you don't have a dehydrator. I found that you can do this in your oven too. I just set this on my lowest temperature available.

I've heard people suggest 100-150 degrees Fahrenheit, but my oven only goes down to 200 otherwise it shuts off.At 100 degrees it takes about 12 hours, so at 200 degrees it only took about 6 hours.

I first came up with this idea when I found out my friend Michelle does not use onions after a certain time since  they have been cut (something about onions absorbing toxins if left out in dry air). -This one is for you Michelle-now you have a way to save your onions! Once dried any toxins that would have been in the vegetable would now be gone.

Ingredients: Onions

Directions: Heat Oven 150-200 degrees. Place vegetables on a pan (crinkled foil works best) in the oven until dried. Leave oven open a crack to encourage air circulation.


Drying button mushrooms.

Drying carrot chips!

Subscribe to Saving With Selena

Thursday, February 21, 2013

How To: Make Giant Bows For Decoration


How to: Make Giant Bows For Decoration:
1. Cut plastic tablecloths into strips.
2. Take two colors and tie into a bow.
3. Use a pencil or dowel rod for an anchor if you have a hard time tying it.
4. Tape, glue, or tack to the corners of the table or any other object you wish to bow-ify.
Suggestion: for a more permanent giant bow, consider purchasing tulle or heavier waterproof fabric like the kind used for outdoor furniture.
These are great for any occasion, especially ones with kids, because even if something gets spilled on them, they can be washed or recycled! Easy clean up!
For more party tips, check out How To: Make A Wishing Tree.

Sunday, February 10, 2013

17 Ways To Use Bread Tabs


Bread tabs. I know you have a handful of them stuck in a junk drawer. Here are a few ways to use those babies...

Organize your cords
Source: thedailydigi.com
Store spare hair pins 
Creative Commons savingwithselena.blogspot.com
 Stitch marker
img_0570
Source: http://pjsallday.com/2012/04/wfmw-knitting-trick/
Reusable quilt marker
Source: http://sewmanyways.blogspot.com/2010/04/tool-time-tuesdayanother-freebie.html
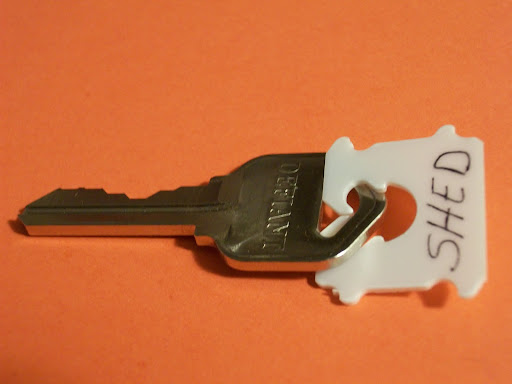
Label spare keys
Source: http://wholelivingdaily.wholeliving.com/2010/06/10-re-uses-for-those-little-bread-tags.html
Wall art

Source: https://picasaweb.google.com/lh/photo/AoDuU-2RUrmoLqXffY9-LDpETjShzj62LsXYUxYJ9Q8?feat=embedwebsite
bread_tab_debs.jpg
Source: http://www.kapshow.com/pinkos/archives/2007/03/bread_tab_debs.html
Source: http://www.greencricketsalvage.com/2011_08_01_archive.html
Guitar Picks
Make these mini monsters for Halloween party bags...

Halloween Eco Friendly Craft Recycled Bread Tag Monsters
Source: http://planetforward.ca/blog/tag/bread-tabs/
Wine Glass charms for parties- you'll never mix your drinks up again
Source: http://www.yeswecoupon.com/frugal-projects/wish-i-would-have-thought-of-that-1-5-uses-for-bread-tabs/
 Bingo Chips
Source: http://scrapreusedandrecycledartprojects.blogspot.com/2010/09/reuse-plastic-bag-ties-play-bingo.html
Make this necklace
Source: http://www.michlinla.com/2011/04/slap-another-post-with-dueling-crafters.html
Or these earrings
Bread Tab Earrings
Source: http://earcandie.com/recycled.html
http://www.wizzybliss.com/breadtag_earrings.jpg
Source: Wizzy Bliss Jewellery. Earrings.
www.wizzybliss.com/breadtag_earrings.jpg
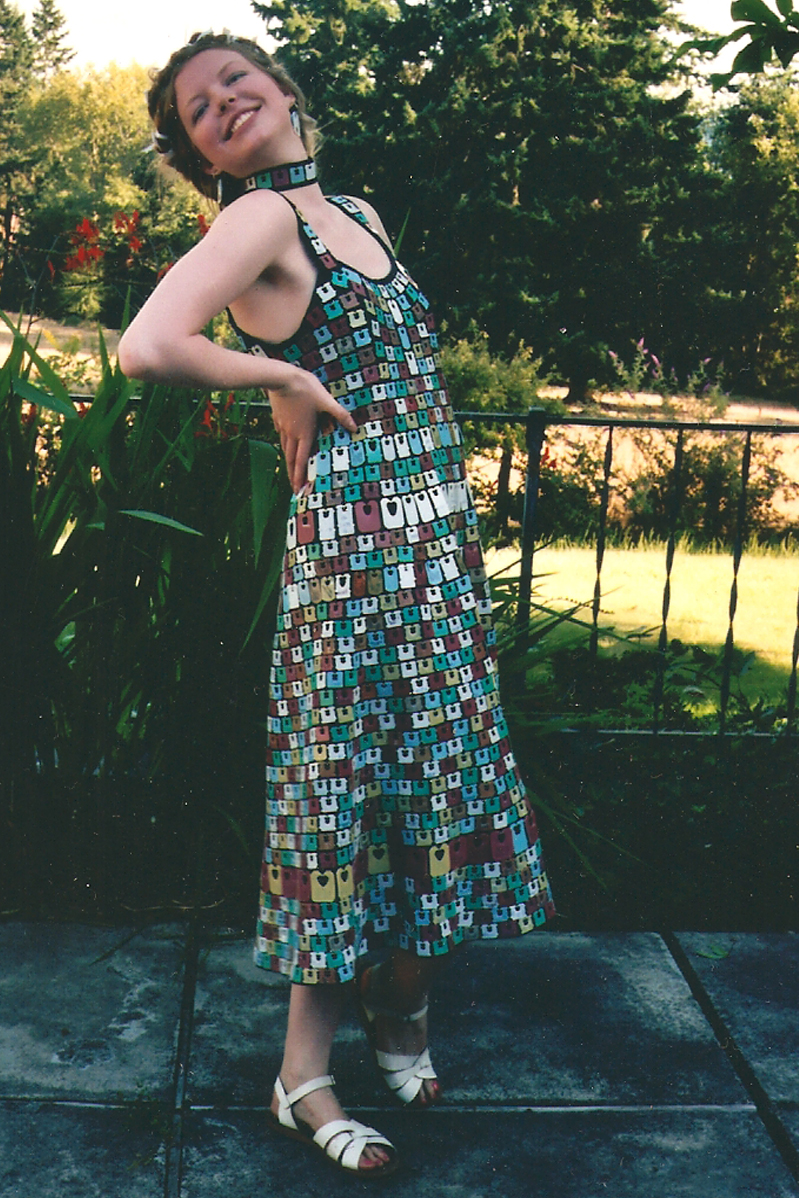
Make a dress
Source: http://johannachambers.deviantart.com/art/Bread-Tab-Dress-53838523
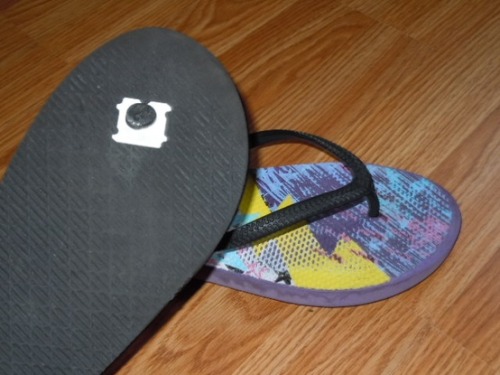
Fix your flip flops

Source: http://www.tumblr.com/tagged/bread%20tabs
Mark the end of the tape without wasting it.

And of course.... ;)

*Original sources are unknown for all photos above without sources listed. If the above are yours, please let me know and I will gladly add credit where credit is due.*

Tuesday, January 29, 2013

How To: Make A Wishing Tree Vase


"A wish tree is an individual tree, usually distinguished by species, position or appearance, which is used as an object of wishes and offerings. Such trees are identified as possessing a special religious or spiritual value. By tradition, believers make votive offerings in order to gain from that nature spirit, saint or goddessfulfillment of a wish."
- Wikipedia


 I think the concept behind a wishing tree is really beautiful. Although this is not a post about wishing trees in their original uses, this simple and easy craft project is meant to emulate the symbolism of wishes as a really basic how-to make a wishing tree vase for sentimental and meaningful decorations at weddings, showers, and birthday parties.
 

We threw a baby shower for my friend and coworker, Kristie and I helped coordinate decorations. Kristie is having a little girl so we used pink, purple, and yellow.

 
 Wish trees are very easy to make and super affordable.This kind is basically a bouquet of twigs with notes attached and with a little bit of planning, it is practically free, but priceless in terms of sentimentality! I love things like that! This is proof that you don't need to spend an arm and a leg or be super extravagant  or extremely crafty to do something nice for someone.
How To: Make a Wishing Tree...

1. Simply gather branches, a vase, tags or note cards of some kind.
2. After your guests arrive they can write their well wishes for you and attach to the branches.
3. We used premade cardstock circles and mini clothes pin clips. You can also punch a hole and tie with string or purchase pre-made paper luggage tags.
4. Get creative! Come up with ideas for how to attach the wishes in a unique way that fits the theme of your event. Make it funky. Make it elegant. It is up to you!

Ours turned out beautifully and the best part was that at the end of the day Kristie had all these wonderful note to put in her daughter's baby book.

Would you make a wishing tree vase for your shower?

This post is dedicated to Kristie and little Jenna. Kristie recently brought home her little bundle of joy, Jenna. Congrats!
Subscribe to Saving With Selena

Sunday, January 27, 2013

How to Be a Super Mom: Part 2: Morning Routines


Krystal's three beautiful children...
 
The following is the second in a guest post series by Krystal Taylor my good friend and “Super Mom” of three...

 A few months after her second and third children were born (surprise, twins!), her husband got laid off so she had to go back to work. Here are a few of the life saving tips that she uses to balance work and home life.
Getting ready for school…..the battle of the sleepy kids! My son, like most five year old children, much rather play then to get ready for school. Since I realized (late in life) that being organized and managing time is important I wanted to start teaching him the same thing. I made him a chart he is responsible for each and every morning. Every day he completes his tasks he gets a sticker. He can use them for small rewards (choosing a movie on movie night) or save them up for larger ones (getting a new game or book)
Karson and his morning routine chart

Other Posts By Krystal: 
 Miss How to Be a Super Mom Part 1? Check it out here: What's For Dinner?
Here's some sound financial advice: How to Set Up a House Account

Check out Krystal's Blog: Quest Of A Crazy Mom

Subscribe to Saving With Selena
Thursday, January 24, 2013

Life Hack: Cheap Fruit Cleaner

How to Make Cheap Fruit Cleaner:

Photo by Byrdiegryl  under Creative Commons

Vinegar is a natural cleanser. There are no harsh chemicals or soaps in this recipe.

Try my recipe for vinegar fruit and veggi cleaner:
Add 1C Vinegar to 1 Gallon Water in a bowl or in the sink, and let fruits and veggies sit for 10-15 minutes in the water.
Agitate occasionally.
 Remove and rise.

If the fruit are not that dirty you can use this over again, otherwise, carefully dispose of it. Be warned that pouring this on you plants will kill them! Vinegar is also a natural weed killer! Don't say I didn't warn you! ;)

If you have citrus fruit, remember to zest or peel before tossing the pith and save the good parts of the rind for recipes or tea!

For other cleaning uses check out my vinegar cleaning spray recipe!

Subscribe to Saving With Selena

Monday, January 7, 2013

How to Be a Super Mom: Part 1: What's For Dinner?


The following is the first in a guest post series by Krystal Taylor my good friend, “Super Mom” of three, and blogger…


Krystal, and her beautiful family. Photo courtesy of questofacrazymom.com 
Our family first began with one beautiful little baby boy. We were blessed and happy, life was easy. Around the time our son, Karson, was about one, my husband and I decided we were ready for another baby. Boy, oh, boy did life change! All I can remember from the day of the ultrasound was my doctor saying, “Congratulations, you are having twins,” and my husband saying, “Now we need a minivan.” All I wanted to do was cry! I was happy, sad, overwhelmed, and scared all at once; what a rush of emotions. Time went on and I soon go to meet my two precious babies. Life was good, staying at home raising my children.
Then a few months later, my husband got laid off! As if life with three children was not time consuming enough, I had to go back to work. This meant I had to do everything at home and manage a job. Well, to my pleasant surprise, my husband was a big help.  I also learned that in order to be somewhat successful at this parenting thing, I was really going to have to get organized and manage my time better. Every parent knows how hard being a parent is…. but I thought, “What if I can make my life easier?” so I tried. Here are a few things I have learned along the way. They may not work for everyone, but they sure are life savers for me. J
Krystals DIY Meal Planning Chalkboard


What is for dinner!!?!?!?  
Even if you don’t have children, this is something most people don’t know until a few hours, or even one hour before its time to eat. So I decided to plan ahead with a menu for the whole week. It’s easy…no thinking necessary! I first shop for whatever meat is on sale (I buy in bulk). I then plan my meals around the sales and figure out side dishes! I cannot tell you what I lifesaver this has been for me!
To help keep my family organized and informed, I made a chalkboard to hang in my kitchen so everyone knows what’s for dinner- and it helps me!
Here's the best part: I made it for only $10.00!!!
I bought a cheap framed picture for $6.00 from the store. Used chalkboard paint to paint over the glass. I simply use the kid’s sidewalk chalk to write on it ;)
~__________________________________________________________~
Want to hear more from Krystal? Look out for the next installment of her guest posts and check out her blog at: Quest Of A Crazy Mom!
Looking for other posts like it?


February seed starting is just around the corner!
Now is the perfect time to start a seed train!